80C552 Development

Last year I owned some Hardware with a Philips 80C552 MCU equipped, and I figured out two more devices.

One is a Coin counter with display, and I’ve seen the time always starts at 7:40 so I figured out that the M48T Timekeeper (In German we say “Tick-Tack-Stein”) was not working. With some tutorials I was able to mill the M48T and solder a new battery on.

At next the Coin counter shows not the correct currency, so at that point I decided to dig into the 80C51 development.

I dumped the ROMs and I look at the available 80C51 debugger/disassemblers etc. but none of them would fit fully the 80C552. So, I decided to create an own listing generator and debugger.

The app is written in C# .Net and WPF and is here available: https://github.com/mr-sven/Sim80C51

In the end I found the memory address where the index of the language table is stored, and I changed it to the correct currency.

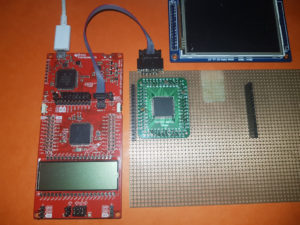
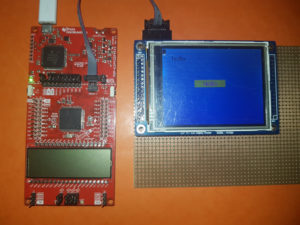
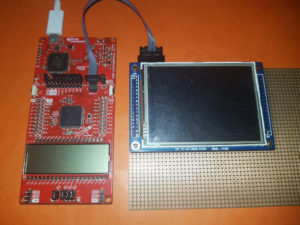
Connecting MSP432™ with HY32D Display

I recently started implementing the HY32D display in MSP432 ARM. I’m using full 16Bit parallel interface via Port B to communicate with the display controller.

Hardware:

  • Display HY32D
    • Controller: SSD1289
    • Interface: 16Bit parallel + 5 control pins
    • Touch Controller: XPT2046
    • Interface: 4-Wire SPI + 1 IRQ
    • Backlight PWM
  • µC MSP432p4111

https://github.com/mr-sven/msp432p4111-hy32d-ssd1289-xpt2046

Some of the display functions are implemented using assembler for best performance results.

Update: Aldi Überwachungskamera Maginon IPC-25 HDC

Ich habe jetzt dafür ein GitHub Repository erstellt: https://github.com/mr-sven/ipc-25hdc

Analyse: Aldi Überwachungskamera Maginon IPC-25 HDC

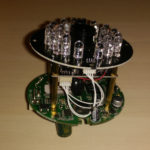
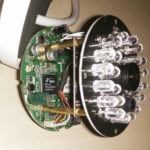
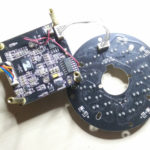
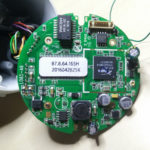
Nachdem ich mir nun eine zweite Kamera dieser Art an geschafft habe, wollte ich nun doch etwas tiefer ein steigen. Eine Analyse bezüglich Sicherheitslücken habe ich nicht vor, mir geht es hauptsächlich darum die Hardware zu analysieren und ggf. die Software zu verbessern oder aus zu tauschen.

Hier erst mal eine Liste mit den gesammelten Daten:

  • Typ: Maginon IPC-25 HDC
  • Betriebssystem: BusyBox Linux
  • Bootloader: U-Boot
  • Hersteller der Software: supra Foto-Elektronik-Vertriebs-GmbH
  • Link zum GPL Source: http://gpl.supra-elektronik.com/
  • CPU: Ralink RT5350F
  • Flash: Winbond W25Q64BV (64MBit, 8MByte)
  • RAM: 32 Mbyte
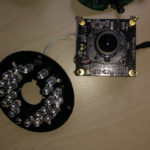
  • Kamera Modul
    • Hersteller: Unbekannt
    • Typ: NIF380VX-EMI-V6
    • Anschluss: USB
    • USB Treiber Baustein: AIT8433 (Alpha Imaging Technology Corp.)

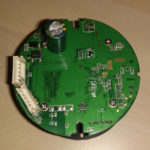
Beim hochladen der Bilder ist mir aufgefallen, das wohl der Pufferkondensator für das PoE zu kein dimensioniert wurde bei der Planung. Aktuell ist ein 100V 100nF auf der Rückseite eingelötet, während der Aufdruck auf der Vorderseite ist.

Anschluss der einer Seriellen Console an das Board über einen 3,3V Serial Adapter.
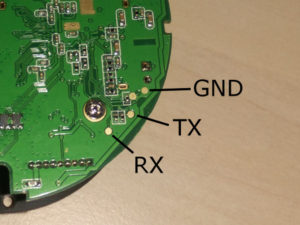
Dump vom Boot Prozess

Dump vom Bootloader

Der Bootloader ist soweit ich das beurteilen kann der Standard U-Boot aus dem Ralink SDK in der Version 1.1.3.

Die Console gibt auch erst mal nichts spektakuläres her.

Analyse Kameramodul

Mein erster versuch die Kamera per USB an einen Rechner an zu schließen und zu sehen was es alles so aus spuckt ist leider gescheitert. Die Kamera bleibt stumm und wird auch nicht im System angezeigt.

Nachdem ich den Boot Prozess unterbrochen habe, ist mir dabei etwas aufgefallen: Auch hier wurde plötzlich kein USB Kamera Modul angezeigt.

Den Boot Prozess kann man besten unterbrechen wenn man den „daemon“ Prozess direkt nach dem Starten killt, denn sonnst wird der Watchdog an geschmissen und wenn man den „daemon“ killt startet auch der Prozessor nach kurzer Zeit neu. Am besten direkt nach dem die BusyBox Version angezeigt wird.

Die Subprozesse kann man in der Datei „/system/init/ipcam.sh“ auskommentieren, so muss man nicht ständig irgendwas killen.

Der Connector zur Kamera hat noch ein paar zusätzliche Pins: LEDCTRL, LCR, RST

Teilweise erschließt sich ja die Funktion. Also habe ich nochmal in das Bootlog geschaut, es taucht die folgende Log Zeile auf:

RT5350/HD/h264/8433/vienc.c, line  413, H264SetIRCutMode        : waiting ait 8433 init over

Kurz danach wird dann auch die Kamera per USB initialisiert. Da wird wohl mit den Pins gespielt um den AIT 8433 zu beleben.

Zum testen habe ich einfach mal den RST Pin auf 5V gelegt und siehe da, die Kamera meldet sich. Habe sie dann nochmal an den PC angeschlossen und sie wird sauber als Kamera installiert.

Die Frage ist nun wie bekomme ich den RST Pin auf high.


Nach mehreren Stunden testen habe ich heraus gefunden, dass der Kerneltreiber manipuliert wurde. Beim öffnen des GPIO Devices meldet sich der Kernel immer mit „ralink gpio release by zqh“ und „clr gpio“. Dem Anschein nach werden alle GPIOs beim schließen des Filedescriptors auf null gesetzt. Sehr toll! Super! Was für ein Freak denkt sich so etwas aus? Ich kann mir momentan kein Szenario vorstellen wo ich das benötigen könnte, selbst wenn der Prozess abstützt, warum soll ich denn das Kamera Modul oder die IR LEDs ausschalten? Was für ein quatsch.

Ich könnt stundenlang so weiter machen, aber genug davon.

Nun gut, hier nochmal die Pinbelegung des Kamera Moduls:

  • 5V – VCC
  • 5V – VCC
  • DM – USB Daten Minus
  • DP – USB Daten Plus
  • GND – Ground
  • LEDCTRL – High wenn IR Filter aktiv
  • GND – Ground
  • LCR – IR LED Control
  • RST – Modul Reset

Nun was interessantes, der uvcvideo Treiber meldet unter anderem das Video Format „MJPEG 1280×720 (30.0 fps)“, daher verstehe ich nicht, warum 720p nur über das Depricated Flash in H.264 auf der Kameraseite geht.

Einige Tests mit den GPIOs ergab folgendes Ergebnis:

  • GPIO 0 – Taste am Netzwerkkabel
  • GPIO 11 – (LCR) IR LED einschalten (geht nur wenn der IR Filter inaktiv ist)
  • GPIO 12 – (RST) Kamera Reset Pin
  • GPIO 13 – Gelbe LED am Netzwerkkabel
  • GPIO 14 – (LEDCTRL) IR Filter

Netzwerk

Während der ganzen Testerei mit den GPIOs musste ich natürlich immer wieder Dateien per TFTP kopieren, das ging natürlich nur mit Netzwerk. Da ich mit mehreren Versuchen das Netzwerk in Gang zu bekommen kläglich gescheitert bin, musste ich immer der „daemon“ Prozess starten um Netzwerken zu können. Das hatte leider immer den Nachteil, dass das GPIO Device immer belegt wurde, also jedes mal neu starten.

Ich habe es dann doch irgendwann geschafft das Netzwerk starten zu können, habe dafür nochmal das Bootlog angeschaut. Da tauchen dann Kommandozeilen auf die den Internen Switch konfigurieren. Tatsächlich ist das im Script /usr/sbin/network.sh alles hinterlegt, also zack das Script ausgeführt und den udhcpc gestartet.

Video

Nachdem ja die Kamera auch 1280×720 per MJPEG kann, habe ich diese Auflösung in das uvc_stream Programm eingepatchd und erfolgreich getestet.


Der Grundstein ist soweit gelegt, ich denke damit kann man eine eigene Firmware für die Kamera bauen. Und wie es weiter geht seht ihr wenn das Licht an geht, nein quatsch. Ich denke das ich nur ein kleines Script schreiben werde, was den uvc_stream Prozess startet, das Netzwerk Konfiguriert und die GPIOs ein schaltet. Ich bin nicht so der Typ für Aufwändige GUIs und Config Kram, aber vielleicht hilft es jemanden oder jemand Forkt das Ralink SDK für die Kamera, dann kann ich mich gerne daran beteiligen.

Anker® PowerLine+ Micro USB

anker_usb
Lieferung:
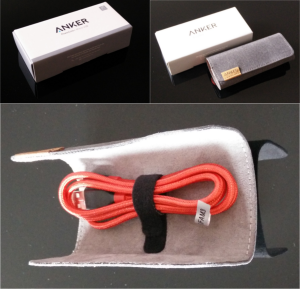
Das mit Kevlar (Synthetische Kunststofffaser) umwickelte Kabel ist in einer sehr eleganten Schutzhülle aus einer Art Filz untergebracht und mit einem Klettband zusammen gebunden.

Das Kabel:
Dieses macht einen sehr hochwertigen Eindruck, fäßt sich gut an und macht das Laden von Geräten zu einem optischen Highlight. Selbst das Übertragen von Daten ist kein Problem.
Die Stecker sind vernickelt, die Pins sind vergoldet, damit ist das Kabel sehr stabil und robust.

Für mich gehört dieses Kabel (durch seine Aufmachung) in die absolute Oberklasse, ich kann es jedem empfehlen und es bekommt von mir volle 5 Sterne.

Ich bedanke mich bei Anker für das Rezensionsexemplar. http://de.anker.com/

Increase MSP432™ SPI Performance – Part 2

Ok, here it is, the Fill function written in assembler.
Due some caching of hardware register addresses in the Core registers, I was able to reduce the following code from 8+ steps to 4.

UCB2TXBUF = data;
while (UCB2STATW & UCBUSY);

The following assembler source is the first full standalone assembler code I wrote. Don’t be mad at me!

ILICTL_POUT   .word 0x40004C42 ; P5OUT
ILIUCI_TXBUF  .word 0x4000280E ; UCB2TXBUF
ILIUCI_STATW  .word 0x40002808 ; UCB2STATW
ILI9341_RAMWR .set 0x2c
ILICTL_DCX    .set 0x0004
UCBUSY        .set 0x0001
 
;############################################################################################
; extern void ILI9341_FillASM(uint16_t color, uint32_t count32);
    .global ILI9341_FillASM
ILI9341_FillASM: .asmfunc
 
Color   .set r0 ; r0 = Color ; Param 0
Count   .set r1 ; r1 = Count ; Param 1
TXBUF   .set r2 ; r2 = ILIUCI_TXBUF
STATW   .set r3 ; r3 = ILIUCI_STATW
POUT    .set r4 ; r4 = ILICTL_POUT
ColorH  .set r5 ; r5 = Color >> 8
Slow    .set r6 ; r6 = Count & 0x0007
Buffer  .set r7
 
    push {r4-r7}
 
; cache hardware register addresses
    ldr TXBUF, ILIUCI_TXBUF
    ldr STATW, ILIUCI_STATW
    ldr POUT, ILICTL_POUT
 
; ILI_COMMAND
    ldrb Buffer, [POUT]
    bic Buffer, Buffer, #ILICTL_DCX
    strb Buffer, [POUT]
 
; transmit ramwr byte
    mov Buffer, #ILI9341_RAMWR
    strb Buffer, [TXBUF]
 
RAMWR_Busy_L: ; wait until transmit
        ldrb Buffer, [STATW]
        tst Buffer, #UCBUSY
        bne RAMWR_Busy_L
 
; ILI_DATA
    ldrb Buffer, [POUT]
    orr Buffer, Buffer, #ILICTL_DCX
    strb Buffer, [POUT]
 
    lsr ColorH, Color, #8 ; Color >> 8
    ands Slow, Count, #0x0007 ; Test if lower bits of count is set
    beq Fast
 
Slow_L: ; Slow data loop
        strb ColorH, [TXBUF] ; Color H
Slow_Busy_L0: ; wait until transmit
            ldrb Buffer, [STATW]
            tst Buffer, #UCBUSY
            bne Slow_Busy_L0
        strb Color, [TXBUF] ; Color L
Slow_Busy_L1: ; wait until transmit
            ldrb Buffer, [STATW]
            tst Buffer, #UCBUSY
            bne Slow_Busy_L1
        subs Slow, Slow, #1
        bne Slow_L ; continue while slow data
 
Fast: ; Fast data
    lsrs Count, Count, #3 ; count >> 3
    beq End ; if count = 0, goto end
 
Fast_L: ; fast data loop
        ; ----------------- Data 0 -----------------
        strb ColorH, [TXBUF] ; Color H
Fast_Busy_L0: ; wait until transmit
            ldrb Buffer, [STATW]
            tst Buffer, #UCBUSY
            bne Fast_Busy_L0
        strb Color, [TXBUF] ; Color L
Fast_Busy_L1: ; wait until transmit
            ldrb Buffer, [STATW]
            tst Buffer, #UCBUSY
            bne Fast_Busy_L1
 
        ; ----------------- Data 1 -----------------
        strb ColorH, [TXBUF] ; Color H
Fast_Busy_L2: ; wait until transmit
            ldrb Buffer, [STATW]
            tst Buffer, #UCBUSY
            bne Fast_Busy_L2
        strb Color, [TXBUF] ; Color L
Fast_Busy_L3: ; wait until transmit
            ldrb Buffer, [STATW]
            tst Buffer, #UCBUSY
            bne Fast_Busy_L3
 
        ; ----------------- Data 2 -----------------
        strb ColorH, [TXBUF] ; Color H
Fast_Busy_L4: ; wait until transmit
            ldrb Buffer, [STATW]
            tst Buffer, #UCBUSY
            bne Fast_Busy_L4
        strb Color, [TXBUF] ; Color L
Fast_Busy_L5: ; wait until transmit
            ldrb Buffer, [STATW]
            tst Buffer, #UCBUSY
            bne Fast_Busy_L5
 
        ; ----------------- Data 3 -----------------
        strb ColorH, [TXBUF] ; Color H
Fast_Busy_L6: ; wait until transmit
            ldrb Buffer, [STATW]
            tst Buffer, #UCBUSY
            bne Fast_Busy_L6
        strb Color, [TXBUF] ; Color L
Fast_Busy_L7: ; wait until transmit
            ldrb Buffer, [STATW]
            tst Buffer, #UCBUSY
            bne Fast_Busy_L7
 
        ; ----------------- Data 4 -----------------
        strb ColorH, [TXBUF] ; Color H
Fast_Busy_L8: ; wait until transmit
            ldrb Buffer, [STATW]
            tst Buffer, #UCBUSY
            bne Fast_Busy_L8
        strb Color, [TXBUF] ; Color L
Fast_Busy_L9: ; wait until transmit
            ldrb Buffer, [STATW]
            tst Buffer, #UCBUSY
            bne Fast_Busy_L9
 
        ; ----------------- Data 5 -----------------
        strb ColorH, [TXBUF] ; Color H
Fast_Busy_L10: ; wait until transmit
            ldrb Buffer, [STATW]
            tst Buffer, #UCBUSY
            bne Fast_Busy_L10
        strb Color, [TXBUF] ; Color L
Fast_Busy_L11: ; wait until transmit
            ldrb Buffer, [STATW]
            tst Buffer, #UCBUSY
            bne Fast_Busy_L11
 
        ; ----------------- Data 6 -----------------
        strb ColorH, [TXBUF] ; Color H
Fast_Busy_L12: ; wait until transmit
            ldrb Buffer, [STATW]
            tst Buffer, #UCBUSY
            bne Fast_Busy_L12
        strb Color, [TXBUF] ; Color L
Fast_Busy_L13: ; wait until transmit
            ldrb Buffer, [STATW]
            tst Buffer, #UCBUSY
            bne Fast_Busy_L13
 
        ; ----------------- Data 7 -----------------
        strb ColorH, [TXBUF] ; Color H
Fast_Busy_L14: ; wait until transmit
            ldrb Buffer, [STATW]
            tst Buffer, #UCBUSY
            bne Fast_Busy_L14
        strb Color, [TXBUF] ; Color L
Fast_Busy_L15: ; wait until transmit
            ldrb Buffer, [STATW]
            tst Buffer, #UCBUSY
            bne Fast_Busy_L15
 
        subs Count, Count, #1
        bne Fast_L ; continue while fast data
 
End:
    pop {r4-r7}
    bx lr
    .endasmfunc

Increase MSP432™ SPI Performance – Part 1

Currently I work on a 240×320 Pixel QVGA Display, connected via SPI. As I wrote this article I mentioned this was a bad idea.

Following calculation:

  • 240 x 320 Pixel = 76.800 Pixel
  • 16 Bit (Color Mode) * 76.800 Pixel = 1.228.800 Bit
  • MSP432P401R SPI max frequency = 24MHz
  • 24.000.000 / 1.228.800 = 19,53125

This makes a maximum Full Screen FPS of round about 20. So for the human eye it is to slow.

Ok, for now I can’t break this limit, but I can try to reach it.

Try One: use eUSCI ISR handler

void UCIA0IsrHandler(void)
{
    switch(UCIA0IV)
    {
    case 0x0004: // UCTXIFG
        if (fill_count & 0x001)
        {
            UCIA0TXBUF = fill_data_h;
        }
        else
        {
            UCIA0TXBUF = fill_data_l;
        }
        fill_count--;
 
        if (fill_count)
        {
            return;
        }
 
        UCIA0IE &= ~(UCTXIE);
        break;
    }
}

Whats the result of this: a bad one. I tried to count the CPU steps until the new byte is pushed to the transmit buffer.

The Disassembler shows 14 steps, I think with ISR Join and Leave I’m over 16, which results in a gap between each byte and the transmission is slower than 20 fps.

There are possibilities to optimize this code, but for me are 16 steps between ISRs too few.

Try Two: Synchronized transmission

#define SendSync(data) \
    UCIA0TXBUF = data; \
    while (UCIA0STAT & UCBUSY);
 
void Fill(uint16_t color, uint32_t count32)
{
    uint8_t a = color >> 8;
    uint8_t b = color;
 
    uint8_t slow = count32 & 0x07;
    if (slow)
    {
        do {
            SendSync(a);
            SendSync(b);
        } while (--slow);
    }
 
    // x8 unrolled
    int count = count32 >> 3;
    if (count)
    {
        do {
            SendSync(a);
            SendSync(b);
 
            SendSync(a);
            SendSync(b);
 
            SendSync(a);
            SendSync(b);
 
            SendSync(a);
            SendSync(b);
 
            SendSync(a);
            SendSync(b);
 
            SendSync(a);
            SendSync(b);
 
            SendSync(a);
            SendSync(b);
 
            SendSync(a);
            SendSync(b);
        } while (--count);
    }
}

This results in 8 Steps for each byte and with a bit logic you reach the 20 fps.
What comes next?, decrease the code size. This can be done using Assembler.
The next part, I hope will contain the Fill function in asm.

First summary

At first I would say: what the heck, (TI) you build a 32Bit ARM Core based on MSP430 but there is only a 8Bit SPI Interface. Why don’t use in addition a transfer mask, that makes it variable in how meany bits to transfer. In my case I could set a 16bit mask until the data can be divided by two and then I can ship 32bit data.

This could make the use of ISR more efficient, because this creates a gap of 64 CPU Steps, which are enough to do other stuff.

MSP432™ Interrupt system

The MSP432™ uses a additional level for interrupts: the Nested Vectored Interrupt Controller (NVIC). Every interrupt you request must be enabled in the NVIC.

To enable for example the Timer_A0_N interrupt you have to call also the NVIC function:

NVIC_EnableIRQ(TA0_N_IRQn);

You can see a list of all interrupts in the msp432p401r.h file, there is a enum type IRQn_Type.

At next you can choose between Code based and RAM based interrupt vectors.

Code based interrupt

The Code based interrupts are hardlinked between the IVT and the ISR.

To put a ISR in the IVT you have define the ISR in your application first:

// ISR for Timer_A0_N
void Timer_A0_N (void)
{
	// handle IRQ
}

At default the IVT is defined in the msp432_startup_ccs.c file, there you have to declare your function:

/* External declarations for the interrupt handlers used by the application. */
/* To be added by user */
extern void Timer_A0_N (void);

At last you assign the function to the IVT:

#pragma DATA_SECTION(interruptVectors, ".intvecs")
void (* const interruptVectors[])(void) =
{
	(void (*)(void))((uint32_t)&__STACK_END),
	...
	Timer_A0_N,                             /* TA0_N ISR                 */
	...
};

In the document SLAA656 (MSP432™ Platform Porting Guide) version 2015-03 is witten the old „#pragma vector“ method should also work, but at my tests the compiler thows some errors on it.

RAM based interrupt

RAM based interrupts can be used in oder if you have multiple applications running on your MSP and every application has it’s own ISRs.

For the use of RAM based interrupts I recommend to use the MSP432 DriverLib Interrupt API. You have to create a RAM table and manage the IV entrys and the API is straight forward and implements all the needed functions.

You can start using Code based interrupts, if you call the Interrupt_registerInterrupt function at first time, it will copy the whole IVT from Code to RAM.

The Interrupt_registerInterrupt and Interrupt_unregisterInterrupt does not enable or disable the interrupt, you have to call Interrupt_enableInterrupt and Interrupt_disableInterrupt manually.

As example the timer interrupt:

// from MSP432 DriverLib
#include "interrupt.h"
 
// ISR for Timer_A0_N
void Timer_A0_N (void)
{
	// handle IRQ
}
 
void main(void)
{
	...
	Interrupt_registerInterrupt(INT_TA0_N, Timer_A0_N);
	Interrupt_enableInterrupt(INT_TA0_N);
	...
}

MSP432™ Clock System speed

Changing the Clock Speed of the MSP432™ is a bit tricky. First you have to unlock the registers, then you can change the DCO speed. You can ajust the clock using the following DCO values.

DCORSEL min MHz normal (DCOTUNE = 0) MHz max MHz
DCORSEL_0 1 1.5 2
DCORSEL_1 2 3 4
DCORSEL_2 4 6 8
DCORSEL_3 8 12 16
DCORSEL_4 16 24 32
DCORSEL_5 32 48 64


Read more in document SLAU356A (MSP432P4xx Family Technical Reference Manual) version 2015-04 section 5.3.

You can increase or decrease the speed using the DCOTUNE Register to any value between min and max. For the correct values of DCOTUNE consult the document SLAA658 (Multi-Frequency Range and Tunable DCO on MSP432P4xx) version 2015-03. These values can be obtained from the TLV.

TLV->rDCOIR_MAXNEGTUNE_RSEL04; // DCO IR mode: Max Negative Tune for DCORSEL 0 to 4
TLV->rDCOIR_MAXPOSTUNE_RSEL04; // DCO IR mode: Max Positive Tune for DCORSEL 0 to 4
TLV->rDCOIR_MAXNEGTUNE_RSEL5; // DCO IR mode: Max Negative Tune for DCORSEL 5
TLV->rDCOIR_MAXPOSTUNE_RSEL5; // DCO IR mode: Max Positive Tune for DCORSEL 5

The CSKEY register is described as CSACC in the documentation, but in Code Composer Studio the register has still the name CSKEY.

Example change DCO to IR and 48MHz:

CSKEY = 0x695A; // unlock CS registers
CSCTL0 = 0; // reset DCO settings
CSCTL0 = DCORSEL_5; // select DCO 5 (48MHz)
CSCTL1 = SELA__REFOCLK | SELS__DCOCLK | SELM__DCOCLK; // ACLK = REFOCLK, SMCLK = MCLK = DCOCLK
CSKEY = 0; // lock CS registers

WD-G1610J LCD Display Pinout

VCC is 3.3V

160×100 Pixel

SPI is running at 5MHz (8MHz and 16MHz should work)

  1. LED 1 Anode
  2. LED 2 Cathode orange
  3. LED 3 Cathode green
  4. NC
  5. GND
  6. CSn (Chip Select)
  7. RESET (0V = off, VCC = on)
  8. RS (Register Select, 0V = Command, VCC = Data)
  9. Resistor switch, maybe to detect if backlight is supported, via R2 tied to GND
  10. CLK (Clock)
  11. DI (Datain)
  12. VCC
  13. Contrastvoltage output (11.1V)
  14. GND
  15. Keyout 1
  16. Keyout 2
  17. Keyout 3
  18. Keyout 4
  19. Keyout 5
  20. Keyin 1
  21. Keyin 2
  22. Backlight GND
  23. Backlight VCC
  24. GND